Monday, September 13, 2010

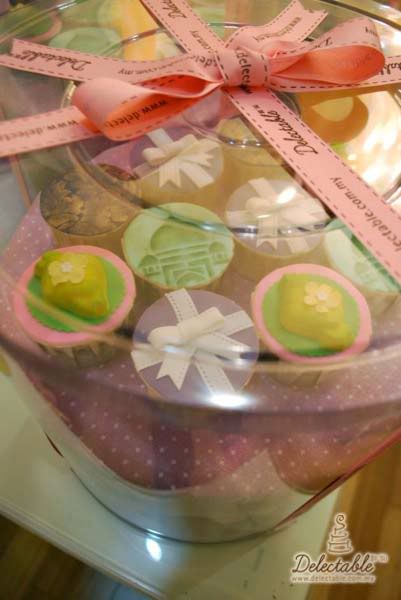
Fantastic Chocolate Cherrybombs

Juicy, luscious and spewing with decadent fluffy whipped cream.
Each scoop comes with just enough chocolatey goodness layered in the base.
For those who love having their cherries on top; we've got 7 individual yummy cherries exploding with flavoursome liquid centers!
There are secret crunchy bits hidden in between as well.
I then smother a dark black cherry compote all over to tie it together.

Fantastic Chocolate Cherrybombs

Fantastic Chocolate Cherrybombs

I had a 'naming' session for these with a bunch of different friends in the past couple of months and WOW... the horror! *laughs* Any ideas guys? The winner gets a box on the house and a big big hug yah!

*note: whoever pulls out a "Black forest" is gonna get "kirsch-ed" in the head :P No...no.. I'm looking for something original!

Fantastic Chocolate Cherrybombs

Now now...stop drooling and come on over to the Delectable store to check out these brand new cherrylicious boxes of yummyness!

COME!... COME! Come try!! :P

Sunday, September 12, 2010

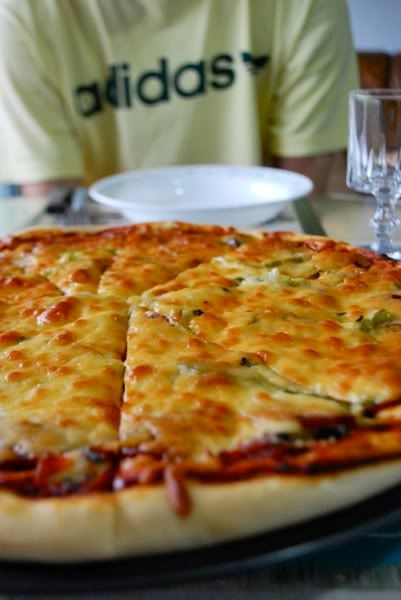
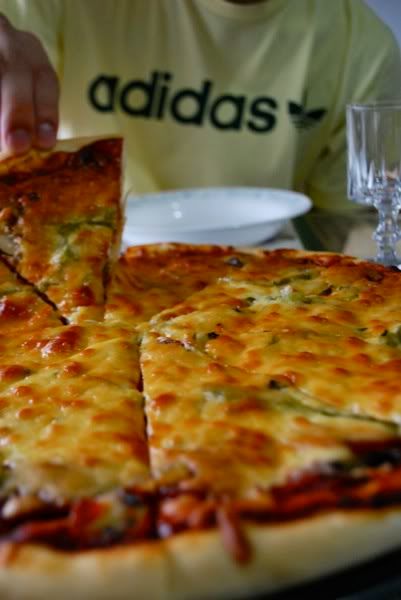
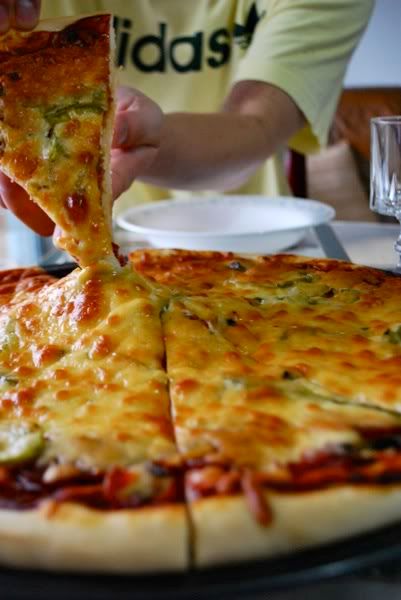
Making Pizza with My Family

I just recently took a little time off work to be with Jo in Sydney.

He says I don't blog enough and that I should put up recipes of my cooking like I used to. Okay okay.. he is right... haha I rarely get the chance to cook and photograph at the same time; so this was a fun project we did together! He understands how busy I am; but he keeps reminding me of important aspects of my life I sometimes easily take for granted.

I had such a fulfilling holiday! I got some work done in between; visited my favourite Sydney spots, got to see my friends; watch Jo graduate at uni; hung out with family, play in the kitchen and leisurely test out a couple recipes for Delectable... it was exactly what I needed!

Before I left; I thought it would be a good idea for Jo and I to make a mother's day lunch for his mom. She cooks for us ALL the time; and though she does let me be sous chef occasionally; I thought it would be nice if Jo and I could make her something for a change. Omma (mom) makes the most ridiculously delicious rice and homemade Korean dishes; ridiculously... I pile on the pounds each time i visit! She's just too good! Resistance is futile.

Instead of trying to guess what she'd like to eat; we asked her what she wanted us to make.
She said "Thin crust gourmet pizza"

....oh ... wow.. for 2 seconds she caught my face going blank! Hahaha and then I thought of instant dry active yeast..and *phew* my complexion gained colour again. She did a little laugh; and said it was okay if I don't know how to make pizza. Well, I knew HOW.. i've just never on my own made it again out of pastry school. *scary*

We went grocery shopping for a brand new pizza pan and gathered a little basket of ingredients.

Jo was so enthusiastic about the idea; he loves pizza! well.. i do too.. and so does Omma; so i guess it was the perfect suggestion!


I've made pizza dough in school once in the past; and I suppose it is pretty easy to wing a recipe like this. The whole process is really really simple to recreate at home.

1 sachet active dry yeast (70-80 grams/0.25 ounces)
1/4 tsp sugar
3/4 cup luke warm water
1 3/4 cup plain flour
1/2 tsp salt

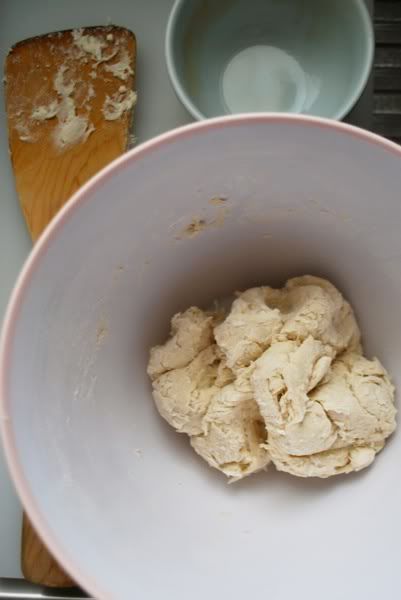
1. Weigh sugar; flour and salt in a mixing bowl. Activate yeast in luke warm water as measurements. Allow to fizzle for 5 minutes or so. Make a well in the m
ixing bowl center; pour in the yeast + liquid mixture; stir to form a rough ball as below.


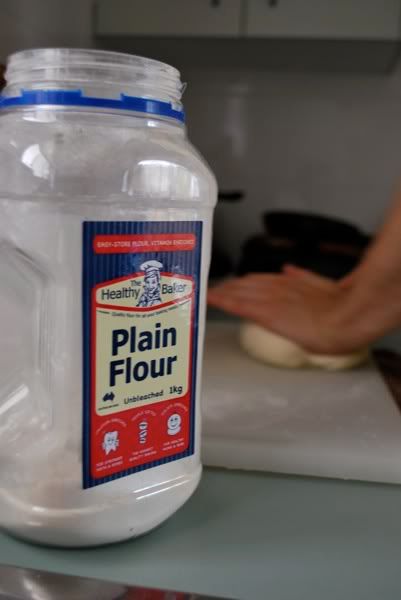
2. Knead dough ball for 2-3 minutes till dough is elastic and smooth. Flour hands a little to make it workable; do not dust too much flour on the kneading surface. Divide dough in half. One recipe makes 2 thin crust pizza's approximately 14 inches in diameter.

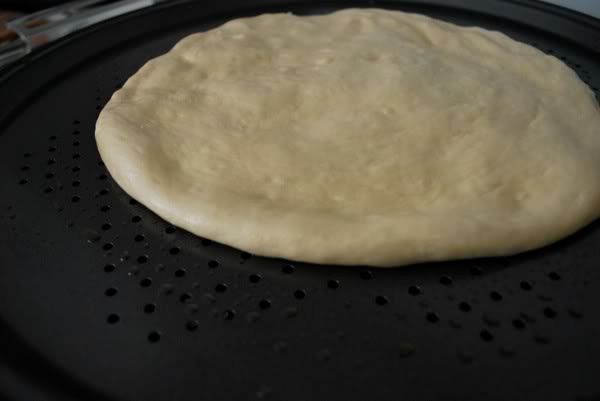
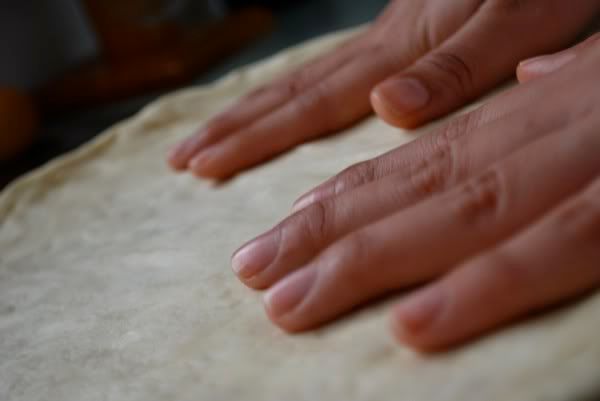
3. Lightly oil surface of pizza pan with olive oil and press out one dough ball to form a small disc. Allow to rest for 5-10 minutes.

4. Press out dough disc to reach corners and form a thin base crust. If it continues to shrink inwards; allow to rest; and press out again.

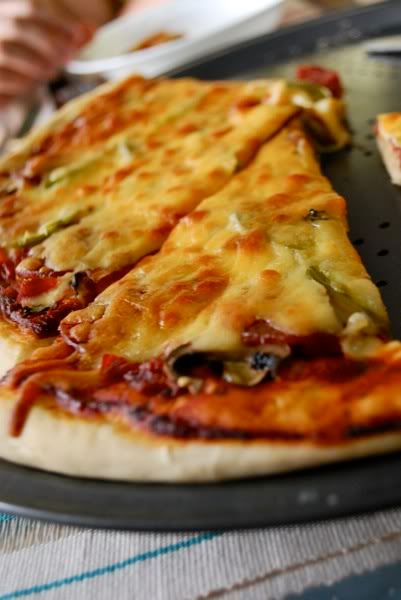
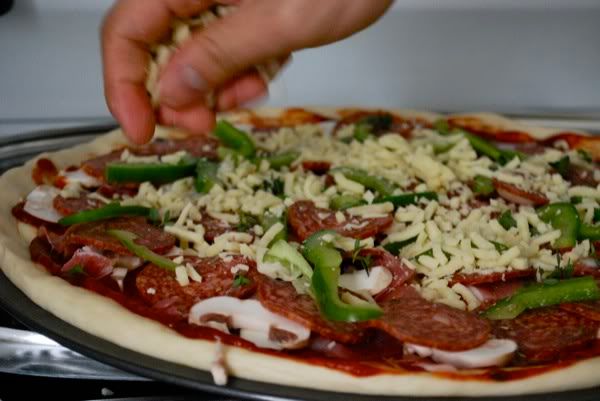
5. Toppings!! tomato base first; and then meats; veges... top with cheese and Italian herbs. Remember to thinly slice your components and never pile the pizza too thick! a little cheese goes a long way ;)


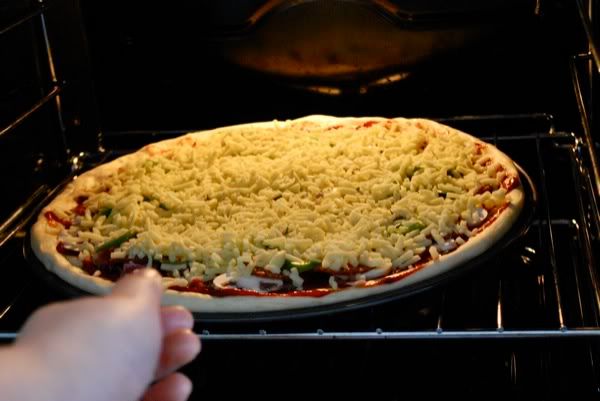
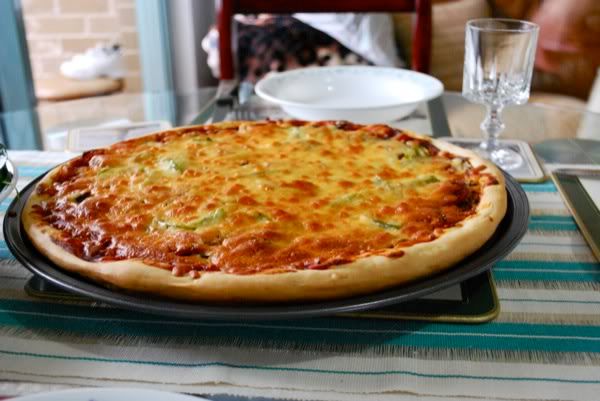
6. Bake in preheated 170 degree oven for 40 minutes; till crusts are golden; cheese is bubbly and deliciously melted; ahhh!! i love pizza! haha

We were tempted (more than a couple times) to pop an 'instant' pre sauced pizza base into our trolley at the supermarket; but thank goodness we didn't succumb! This recipe is MUCH much Yummier!


Jo measured the ingredients while I activated the yeast.
It was really nice to be cooking with Jo again. He's a chemist; a perfectionist at recipe measuring haha. As I watched and photograph him kneading the dough; I recalled how much he used to help me in the kitchen when I had just began venturing into the cake business 3 years ago in Australia. He's sweet, kind, intelligent, funny, helpful, loves cake and makes excellent pizza from scratch... i'm one lucky lucky girl!

Friday, September 10, 2010

Making Yogurt in the Microwave

This summer, prices for a gallon of milk has gone down tremendously - only $1.49 for a gallon. Thus making homemade yogurt less expensive.although it is already so much less than the store-bought ones. Making your own helps you control the amount of fat you consume but i find that whole milk yogurt is richer and tastes the best. Fruits and berries are of abundance and cheap too, so do add as much or varieties into your yogurt, it is a real treat. Yogurt-making in any other way is a lengthy project, but using the microwave to make yogurt can save you some time in the process


Ingredients:

Glass bowl

4 cups fresh milk
1/4 cup powdered milk (adding this gives a better texture)
2 tbsp. plain yogurt with active cultures - from the supermaket is fine or leftover from a previous homemade batch

Food thermometer

Microwave

Plastic wrap

Dish towel


Method:
Take the plain yogurt out of the fridge and leave it out on the counter - it has to be at room temp. (Yogurt will take a longer time to set if cold yogurt is used)

Pour 4 cups of fresh milk into a glass bowl that is safe to use in a microwave. Choose skim milk for a nonfat yogurt or whole milk for a richer yogurt. (i put the milk in the container that the completed yogurt will be stored in the fridge - save me washing the glass bowl)

Add 1/4 cup powdered milk and stir well.

Put the bowl of milk in the microwave and heat it on high power for 3 - 4 minutes. The temperature of the milk should reach 175 - 180 degrees F. (Time to reach 175 - 180 f depends on the wattage of your microwave) After 4 minutes or more, check the temperature with a food thermometer.(Cooking the milk is to kill unnecessary bacteria present)

Allow the milk to cool down for a few minutes. Keep the thermometer in the bowl and let it cool down until the temperature reads 100 degrees F(Higher temp will kill the culture)

Add 2 tbsp.plain yogurt with active cultures to the milk. This serves as your starter. Stir well.

Cover the bowl with milk and yogurt with plastic wrap (my container has a lid, so i just close it with the lid)and wrap a dish towel around it to provide additional insulation.(It is hot now, summer, so i do not need to wrap with a dish towel, i left it on the counter).

The yogurt will be set eventually and when set, put in the refrigerator to chill, it will set further.(If you like your yogurt sour, keep it longer on the counter before chilling in the fridge)

Enjoy with fruits, granola etc, anything your heart desires.

As part of the Foodbuzz Tastemaker Program, I received this ALL-BRAN Bran Buds from Kellogg's and i have been enjoying it with my yogurt every morning. Thank you Kellogg's.

.


Serves

Thursday, September 9, 2010

Mexican Dish : Chiles rellenos - Stuffed peppers

"Chiles rellenos" are such a traditional Mexican dish.... I remember when I started dating my husband on 2006 (For those who do not know we met online "e-harmony") I was in Mexico and he was living here, in Wisconsin.... And in one of our conversations, I remember him saying: "I wonder what you are going to cook when we marry, because I don't like Mexican food" I told him I was convinced he would LOVE Mexican food once he really tried it but he was pretty sure he had tried "all kinds of Mexican food" here in Wisconsin, he said he had gone to "very authentic restaurants" (they claimed to be authentic) and he says that he saw Mexican people in the kitchens (well, they were employees there, but it doesn't mean they were really cooking Mexican food) One of the things he told me he hated the most was "guacamole", he basically disliked avocado.... Little did he know how much he would love it one day!

So, on his first trip to Mexico, I made sure he ate not just "our real tacos" (which by the way he couldn't stop eating) but I wanted him to try some other Mexican dishes I knew would change his opinion about "Mexican" food.... So, he tried "Chiles rellenos" and it was "love at first bite" he couldn't believe how delicious that dish was, he was all aaahs and ooohs and wows while he ate.... and that is why I want to share with you such great recipe:

"Chiles rellenos" are roasted poblano peppers, stuffed with "picadillo" (a ground beef "guisado" -stew type of thing but not with too much liquid in it-) or stuffed with "queso fresco" (Mexican style fresh cheese) and then passed through an egg batter and finally fried in very very hot oil.

Here is what you need to make them: (4 people)
For the peppers:
4 poblano peppers (get 6 just in case any of the peppers gets torn if it's the first time you are handling these)
2 eggs (divided)
2 cups of all purpose flour
1 tsp. of salt

For the stuffing:
Queso:
1 8 oz. queso fresco (you can easily get this in a "hispanic or Mexican" grocery store)

OR

Picadillo:
1/2 lb. ground beef
1 potato (cubed)
1/2 white onion (chopped)
1 clove of garlic (chopped)
1/2 cup of crushed tomatoes
1/2 cube of chicken bouillon
1/4 cup of finely chopped cilantro (fresh)
salt and black pepper to taste

Directions:

This dish needs to be made with some time, because of all the steps involved and especially if it's the first time you make them, I would say take your good 2 hours (is not too much work but it takes time, trust me, it's all worth it)

First roast the peppers, One or two at a time, cook peppers directly on the grate for about seven minutes. Periodically turn with tongs or a fork to cook all sides of the skin. (don't worry if it looks black, that will go away when you peel it)


Roasting Poblanos Using the Oven or Broiler
To roast peppers in the oven, preheat the oven to 450° F. Spread the peppers in a single layer on a foil-lined baking sheet and cook until the skin blisters and begins to darken, about five to ten minutes.

Put the peppers inside a plastic bag so they can "sweat" and then you can remove the skin easier (for about 8 mins.)


While the peppers are "sweating" make the stuffing, if you are using queso, then skip this step and just cut the queso fresco in 1/4" slices, your stuffing is ready.

If you are going to make "Picadillo" (which I highly recommend you go for it!! You can actually make some chiles with cheese and some others with ground beef and then choose which one is your favorite) then you need to:

1. Sautee the onion and garlic (properly season with salt and black pepper)
2. Add the ground beef (brown it, season it with a little more salt and pepper and make sure it doesn't clump, keep it moving so it is really ground) -cover the pot with a tight lid so the meat releases its juices- (medium heat)
3. Once the meat has browned, get rid of about 70% of the liquid, keep it moving so it fries a little bit and the liquid reduces and add the cubed potato, let it all cook until the potatoes are almost cooked all the way through
4. Add the 1/2 cube of chicken bouillion and the crushed tomatoes, cover, reduce the heat and let it all simmer until the potatoes are cooked all the way through.
5. Remove from the fire and add the chopped cilantro.

Once your stuffing is ready, you can go back to your peppers, peel them (remove the thin burnt layer of skin) and get the seeds and veins out (use plastic gloves because the heat of the peppers is all in the seeds and you can get your hands burnt (TRUST ME!), do this very carefully, trying to keep the flesh of the pepper intact and by opening a 1 1/2 inch slit on one side of the pepper with a sharp knife.

Stuff your peppers with about 3 slices of cheese or 3 tablespoons of picadillo (it also depends on the size of the pepper) they shouldn't be too full that the food comes out or too thin that there isn't enough stuffing inside.


Put the all purpose flour in a bowl and in a separate bowl beat the egg whites until they form peaks, still beating on high with your electric mixer slowly fold in the egg yolks, so the batter stays really frothy.


Now in a pan (deep enough for your oil but not too deep that is hard for you to handle the peppers, you can use something as deep as a wok) start heating the oil, this is one of the main secrets of chiles rellenos, the oil should be really, really hot, ALMOST bubbling, you can test it by adding a little bit of the egg batter and it should fry pretty quick and you should see it "sizzle" immediately. While the oil heats up pass your chile relleno (carefully) and ONE at a time by the flour until the pepper is lightly coated with flour, then immerse the pepper in the egg batter (trying to keep the open side of the pepper up) you can handle the pepper by its tail and tip, quickly put the pepper in the oil and turn it so it is all fried up, the fried egg will prevent the food from coming out of the pepper, once it's all fried and it looks beautifully golden all around put your chile relleno on a plate (lined with paper towel to absorb the excess of oil), Do this for each pepper and THERE YOU GO! Your very own CHILES RELLENOS!


You can serve chiles rellenos with rice and refried beans or rice and lettuce salad, corn tortillas are a MUST. I will share the recipe for a very easy rice tomorrow.

Provecho!

Paloma.

Glutinous Rice Wine

I have to confess that i have shyed away from brewing glutinous rice wine at home for the longest ever, all because of all the superstitions pertaining to brewing wine at home. I finally buck up courage together with inspiration from my friend, Claire and tried making 2 batches, one plain and one with red rice yeast. Claire came to help and all we had to do was to blend the yeast and start assembling the rice for brewing. I had prepped the rice earlier by cooking it in the rice cooker, so that it will be cooled enough for assembling when Claire arrived. I was so excited that i forgot to take pictures of the assembling. I did not take pictures perhaps i was skeptical that the wine will be a success as i know that i will break all rules and superstitions - I did not have a mouthful of sugar when i started making, i talked alot and made it in broad daylight, i did not leave the pot under the bed with a rusty knife on top, i let the 2 pots(crockpots) sitting on the dinning table, perhaps if you make the wine in a glass bottle, it will be better to put it away from the light. According to one of the myths - one should leave the pot alone without peeking, i, of course, have been opening the lids of both the pots and checking for green stuff growing and have been tasting the wine as days go by. Despite of being so rebelious, the wine turned out so sweet and not too alcohlic. The one with the red rice yeast tasted better than the plain one and had more wine, perhaps the extra yeast present in the red rice gave the extra kick and for the extra wine, i think i had sprinkled in an extra cup of water. The whole process was worth it and now my younger friends can have Rice Wine Chicken during their confinement, just inform me and i will brew some.

Ingredients:

8 cups/2.2 lbs/1 kg long grain white glutinous rice
1 pc wine yeast (bigger kind brought from Malaysia)
1 pc wine yeast (small kind available in any asian stores here in the States)
1 cup red rice yeast (also available in the asian stores here)
2 cups filtered water for sprinkling.

Method:

Wash the glutinous rice, drain, and place in rice cooker with enough water to cover the surface(it is just like cooking regular jasmine rice). Put to cook, and when rice is cooked, remove from the rice cooker, then spread it onto foil covered baking sheets and leave to cool completely.(make sure new foil is used to cover the baking sheets) Rice must be completely cold before use.

Using a clean coffee grinder, grind the wine yeast and red rice yeast into powder.

To assemble:

Sprinkle a little wine yeast mixture on to a crockpot and then layer with rice(wet hands with the filtered water and flatten a handful and use it for layering).

Sprinkle with more rice yeast all over the rice and then sprinkle with the filtered water.

Repeat the layering - rice, rice yeast and water until all the rice is done.

Lastly pour the remainder of the filtered water.

Cover crockpot with a clean cloth and then the lid.

Leave it to ferment for 7 days, then open lid and give mixture a good stir with a clean wooden spoon.

Cover crockpot with the clean cloth and lid and leave to brew for another 14 days(the total brewing time is 21 days - if you prefer a stronger alcoholic wine leave for another 7 days).

Wine can be harvested on the 21st or 30th day.

Prepare a sieve or a colander and line it with a clean cloth. Put it over a pot to catch the wine.

Put the brewed wine mixture onto the cloth and let the wine dripped.(patience in letting the wine drip slowly will result in very clear wine).

When all the wine has dripped and the residue is quite dry, remove the residue and store it in a jar or air tight container for many more other recipes.

Bring the wine to a quick boil (my wine started to boil at 180f and of course it is cos i am one mile above sea-level)

Let the wine cool before bottling.

Wine is now to be enjoyed in any way you wish.


Serves

Bran Muffins with Dried Apricots

(12 standard muffins)


Usually bran muffins contain raisins. I didn't have any in the house and didn't feel like going out in this heat, so I chopped up some dried apricots instead.


I ended up making two batches of these, with a few tweaks the second time. (The first batch was a bit sweeter than I like.) This was fine because I only made half the recipe each time. The final batch was moist, not too sweet and very good imo.

1 cup whole wheat pastry flour
3/4 cup wheat bran
1/4 cup ground flaxseed
1 tsp ground cinnamon
1/4 tsp ground ginger
1 tsp lemon zest, finely minced
1 tsp baking powder
1 tsp baking soda
2/3 cup chopped dried apricots, dried fruit or raisins
1/4 cup agave nectar or honey
1/4 cup blackstrap molasses
1 cup unsweetened applesauce
1/2 cup plain yogurt
1/4 cup olive or canola oil
2 eggs

Preheat oven to 350°F. Line the muffin tins with paper or grease and set aside.

Combine the bran, flour, flaxseed, cinnamon, ginger, lemon zest, baking powder, baking soda and dried fruit in a bowl. Mix well.

In another bowl whisk together the agave nectar, molasses, applesauce, yogurt, oil and eggs. Pour this over the dry ingredients; stir until just combined.


Spoon the mixture into the prepared muffin tin, dividing the batter evenly between the 12 cups. The batter will come up right to the top.

Bake for about 25-30 minutes or until a toothpick inserted into the centre of a muffin comes out clean.

Wednesday, September 8, 2010

Raya is here again!

A year has gone by so quickly! I remember over the last season how we scrambled over finishing our raya hamper baskets and organizing myself for the seasonal changes in the store.
I've done a something a little different in comparison to our sets last year; instead of purely doing hamper baskets, I tried to incorporate more full cakes as gifts in this season's raya. It was really well accepted and I'm probably going to develop more on this for festivities to come.
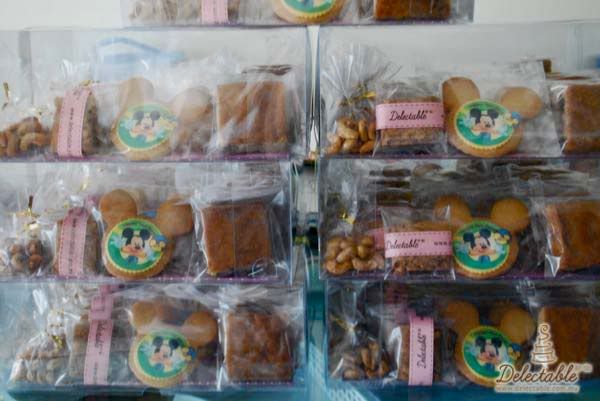
The Delectable outlets have been spilling with our packed corporate orders ready to be shipped and picked up... the raya craziness is almost over now.. and I've already been making plans for mooncake festival! You see many many mickey mice? haha yep; that's all Ive been looking at all week! Working annually with Disney Asia on gifts is super fun! We're allowed to add plenty colours and fun trinkets! Their unconventional styles makes it exciting for me each season throughout the year.
Anyhoo...speaking about mooncake festival; I've planned something specifically for the season too! ;) The specials will be out on shelf in the next couple of days! It's best to keep updated with our specials on (follow) twitter and via (add) facebook.

To all my Muslim friends celebrating the new year; Selamat Hari Raya!
Have a safe drive home to the family and I wish you love; good cheer and yummy raya food! RENDANG!!! I want SOME! haha
Will probably make a stop at the Bangsar ramadan bazaar tonight. MmMm raya goodies!